The Apache Airflow UI
Summary
This is the second post about Apache Airflow. I will be focusing on the UI Element. In case you want to have it more interactive, jump to youtube using the following thumbnail:

or this link: https://youtu.be/HN40YJVptok
We will be discussing following topics:
- Starting up experimental apache airflow using docker
- Data Profiling
- Browse
- Admin
- Docs
- About
- Toggle Drag state and schedule
- Tree View
- Graph View
- Task Duration
- Task Tries
- Landing Times
- Code
- Triggering Dags manually
- Refresh
- Delete
Starting up experimental Apache airflow using docker
Go get a basic version of Apache airflow up and running fast, you can use a docker image that I found quite a while ago.
docker run -d -e LOAD_EX=y -p 8080:8080 puckel/docker-airflow webserver
In case you are using linux as operating system, you may need to add sudo before the command and provide credentials. What this command will do?
- docker run is used to start a container from a given image. More details about docker on how to use it may be part of a new series. If you are interested, feel write to write me a message.
- -d will move the container into the background - moving all output of this container in the background as well. As we are not debugging this container, this output is not interesting for us.
- -e LOAD_EX=y will add an environment variable to the container named LOAD_EX and set this variable to the value of y. For this particular container, example dags will be generated that we will be using for playing around with the apache airflow ui.
- -p 8080:8080 will expose the internal port 8080 from the container to the host system 8080 that you are running docker on.
- puckel/docker-airflow is the image name. You can find the sourcecode of this image on dockerhub: https://github.com/puckel/docker-airflow
- webserver is the command that is run inside the container.
After the download of the image (that can as well take some time), it may take several seconds to start the webserver. You can now access your own airflow installation at http://localhost:8080/admin
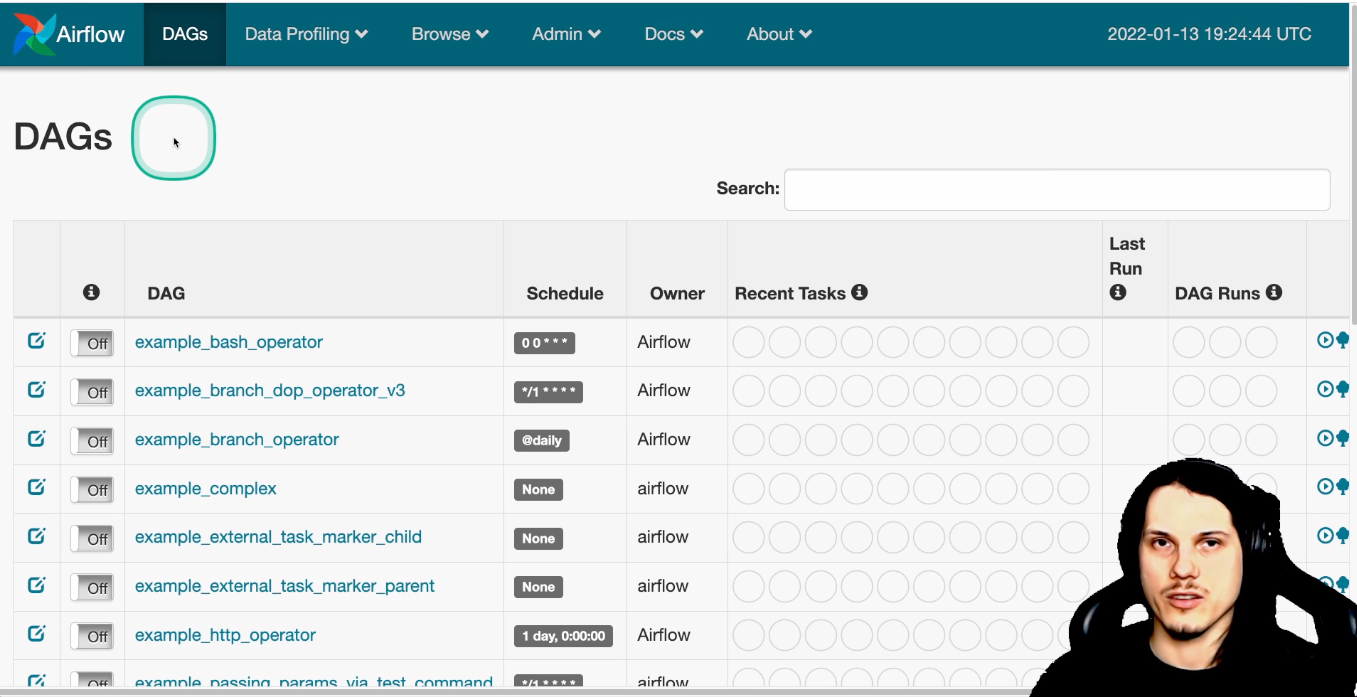
Top Navigation
We will start with the top navigation on the Airflow UI that you can see on the screenshot as well:
Data Profiling
Data Profiling is the first navigation main menu containing of the following submenus:
Ad Hoc Query
In this screen, you can run some SQL queries against your airflow installation.
Charts
In "Charts" - dashboards can be build and viewed.
Known Events
I could not find any valid information what is this for :-)
Browse
The second navigation point is "Browse". Following subnavigation points are available:
SLA Misses
You can configure a SLA for each dag. When a dag needs more time to execute all its tasks, you can get notified by email to further investigate in the issues. In this view, you can see all missed SLA.
Logs
An overview about logs from your airflow installation, dags and tasks.
Jobs
Overview over all executed tasks.
Admin
Pools
A Pool is a term I did not explain in my first post. Consider you have a limited resource, like a database that is not running on a huge server or other bottleneck. When you run several tasks against this resource and it can not be handled, you may consider to put all tasks in the same pool. Apache Airflow will make sure that not more tasks are run inside this pool in parallel, than you defined. When more tasks need this pool, they are in a waiting state until other tasks finish, resulting in opening new slots of the pool.
Inside this admin menu, you can configure all pools and their sizes. By default, all tasks run in the default pool with a size of 128.
Configuration
When you are not sure how particular parts of the system are configured, you can review the present Apache Airflow configuration here. The administrator may disable this functionality.
Users
Configuring users and setting up credentials.
Connections
Configure various connections to other system that you are using in the operators.
Variables
As mentioned in my previous post, variables can be read and set my any task. They are global, meaning changing their value will change it in all tasks that are using this value from the variable. I used them to setup credentials for external services that not change often - more like "constants" that are set in the ui but not in the dag code.
In this view, you can see and edit all variables and their values.
XComs
And another feature I use a lot in Apache Airflow are XComs. They are used for cross communication between tasks. When one task returns a list of directories you want to do a particular operation on, the second task can fetch this information and do something with it. I use it heavy when filling up jinja templates and then executing the output of this rendered templates as new input for a next task. I gave an example where to use XComs in my first article about airflow that you can read here.
Docs
Links to the official apache airflow repository and to documentation.
About
Information about the version used.
Dag Detail Page Navigation
In this section I will go on each element of the dag overview UI, that you can open by picking a dag from the list on the index page. I provide a screenshot from my video to allow you to follow it better.
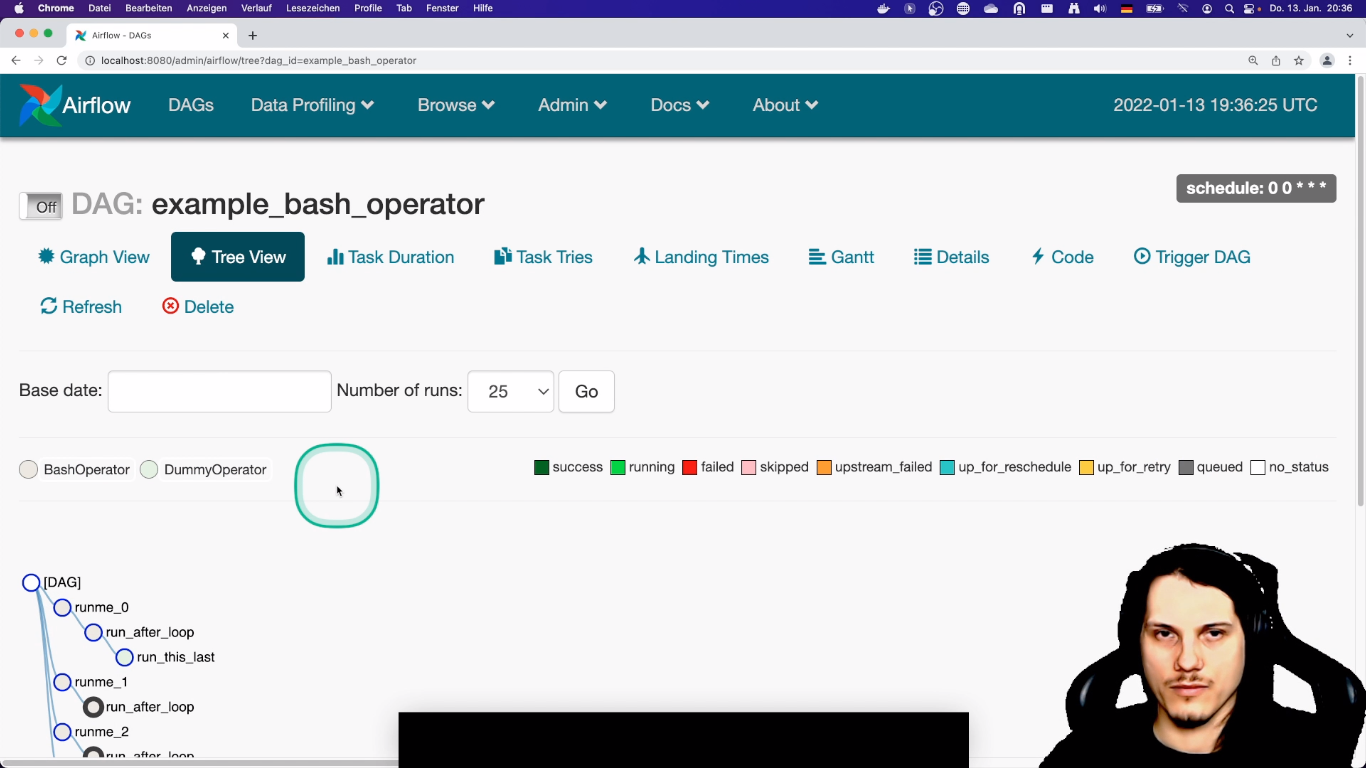
Toggle Drag state and schedule
You can change the overall dag state by clicking on the "off" button. This makes the dag active. Only active dags will be picked up by the scheduler and run. You can also see the scheduler settings of the dag in the right upper area of the screen. They are writing in a crontab style notation. You can't change this setting here - they have to be edited in the appropriate dag python file. We will discuss how to do it in the next blogpost.
Tree View
This is the default view when you open a detail page for a dag. It allows you to see all task dependencies to each other (like in the screenshot) and their running state over the last times that they where running (not in the screenshot). You can use it to quickly identify problems with tasks that are present in a longer period of time and directly restart them (and if you want, all their task dependencies).
Graph View
The Graph view can be used when you are interested in a particular run. Compared to the tree view, tasks are not duplicated in this view - instead they represent by only one node. In this view, you can also zoom in and out and change the order of the visualization. This helps a lot in presentation when you want to show a complex dag in a presentation. You can restart here as well.
Task Duration
How you measured your job execution time before? In Airflow, this is integrated. You can view the last execution times and compare them with each other. This is also good for debugging, as it may indicate that something in the computation or size of your data may have changed.
Task Tries
It looks like the task duration view but shows you the amount of task tries.
Landing Times
In the video, I skipped this. But for the blog post I looked it up. On stackoverflow (of course, where else...) you can find the answer from the author himself:
it's the number of hours after the time the scheduling period ended. take a schedule_interval='@daily' run for 2016-01-01 that finishes at 2016-01-02 03:52:00 landing time is 3:52
Original Source: https://gitter.im/apache/incubator-airflow/archives/2016/06/09
Code
Here you can take a look at the python code underneath the dag. We will go in more detail in a separate post about it.
Trigger Dag
You can trigger a dag manually with this button. Note that this will "fill" the slot of the current interval.
In a nutshell, your task will run at the end of your interval when they haven't been run before. Let us assume that you want your task to start at midnight and you want to run it monthly. The first run of this task will be run at 23:59:59 at the last day of the current month, at the end of the interval. To not mess with the interval, you should clear a failed task instead of triggering it manually.
For more details on intervals please checkout the official documentation: https://airflow.apache.org/docs/apache-airflow/1.10.1/scheduler.html the referenced article references to airflow 1.x, but the concept is the same.
Refresh
You can refresh the dag. This will reload it from the disk and process it again. Any code changes will be picked up.
Delete
This will delete the dag. Note that the file with the dag is present and should be deleted manually as well.
Thanks for reading. In the next post, we will be coding dags and operators. See you soon!