Creating your first dag
Summary
We discussed so far:
- Basic Concept of airflow. In case you need a refresh, checkout the appropriate post about: airflow introduction
- How to navigate on the UI, with a refresh using airflow ui
This is the third post about Coding dags and operators using Apache Airflow. In case you want to have it more interactive, jump to youtube using the following thumbnail:

or this link: https://youtu.be/cF02T-soLTU
We will be discussing following topics:
- Hello World dag
- Installing new dags
Hello World dag
As Apache Airflow is a python library at is core, we have to write python code to add a new dag to our system. I prepared a "hello world" example that you can just use. We will be focusing on airflow 1.x for this time. In a following post, we will look at airflow 2.x and what changes you can find their.
We will add a mount point this time to our docker container that you know. Checkout the last blogpost here, when you need more details about the arguments provided.
mkdir -p ~/airflow-test/dags
cd ~/airflow-test
docker run -d --mount type=bind,src=${PWD}/dags,dst=/usr/local/airflow/dags -e LOAD_EX=n -p 8080:8080 puckel/docker-airflow webserver
First we create a new directory for our airflow dag experiment using mkdir -p ~/airflow-test. When we go into this new created directory. Now we continue with the docker command. Most of the argument you save already in the previous post. What is indeed different, is the new --mount argument I added here. This allows us to link the current directory that we are in, referenced by src=${PWD}/dags with the directory /usr/local/airflow/dags inside the docker container. Now files that we write on our filesystem are synchronized to the container. We disable this time the example dags by setting LOAD_EX=n.
After some booting time, you can connect to the UI by visiting http://localhost:8080/admin in your browser. You may not be surprised that you see no dags - lets create one!
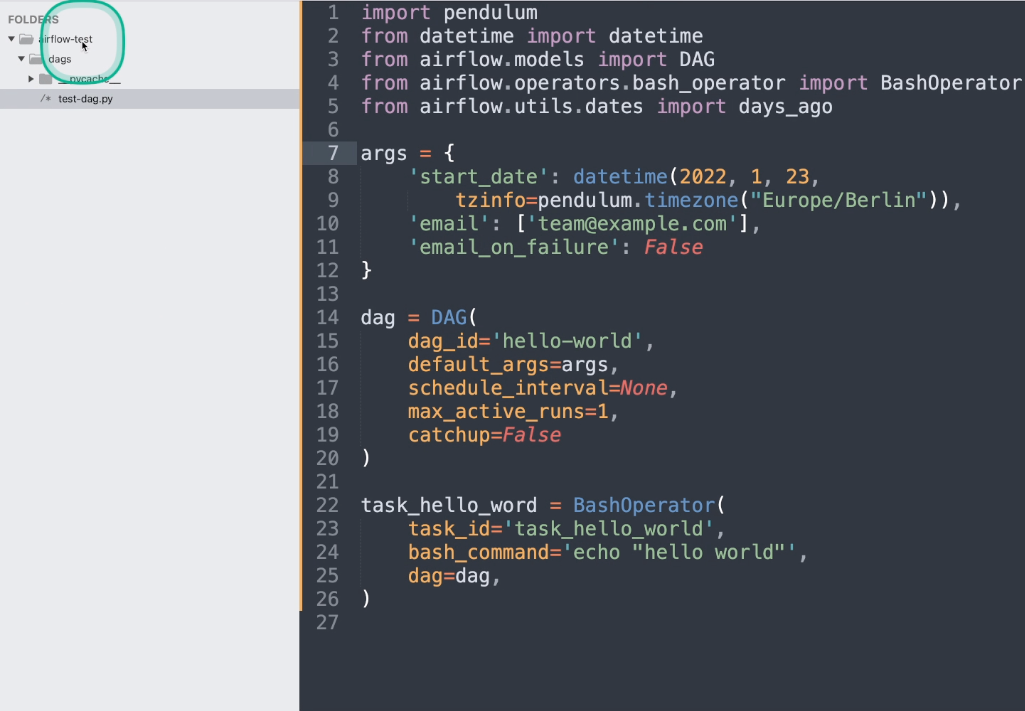
1 2 3 4 5 6 7 8 9 10 11 12 13 14 15 16 17 18 19 20 21 22 23 24 25 | import pendulum from datetime import datetime from airflow.models import DAG from airflow.operators.bash_operator import BashOperator args = { 'start_date': datetime(2022, 1, 23, tzinfo=pendulum.timezone("Europe/Berlin")), 'email': ['team@example.com'], 'email_on_failure': False } dag = DAG( dag_id='hello-world', default_args=args, schedule_interval=None, max_active_runs=1, catchup=False ) task_hello_word = BashOperator( task_id='task_hello_world', bash_command='echo "hello world"', dag=dag, ) |
Save the source code from here to ~/airflow-test/dags/hello-world.py on your local system and save it. Refresh the UI and your new dag should appear on the admin page of your Apache Airflow UI. That's how you can "install" new dags - put them in the airflow dag directory. Airflow will pick them up automatically based on the refresh interval that you can set in the configuration. Now we go into the details, what we just copied.
Imports
import pendulum
from datetime import datetime
from airflow.models import DAG
from airflow.operators.bash_operator import BashOperator
In the first lines, we are importing some classes that we will be using.
Default Arguments
args = {
    'start_date': datetime(2022, 01,23, tzinfo=pendulum.timezone("Europe/Berlin")),
    'email': ['team@example.com'],
    'email_on_failure': False
}
In this part we are creating a dict with some default values that we will be later passing to the dag constructor. We first define a start_date with a timezone. This is especially useful when you want to run your airflow server in your local timezone and set the dags in this timezone as well. Otherwise they will be set to UTC. With email and email_on_failure we can to send emails to accounts in case the dag fails. This should be not used while you are developing a new dag, to not spam yourself. But for a production setup, you can enable notifications here.
Dag creation
dag = DAG(
    dag_id='hello-world',
    default_args=args,
    schedule_interval=None
)
Line 13-19 will create a DAG instance. The first argument is the dag_id that should be global (unique) across your installation.
Then we pass the arguments we just created in line 15. As I mentioned in a previous video/blogpost, you can pass a crontab string to set the schedule_interal - in this example we will run the dag manually.
The Bash Operator
task_hello_word = BashOperator(
    task_id='task_hello_world',
    bash_command='echo "hello world"',
    dag=dag,
)
Line 21 to 25 uses the BashOperator that allows you to run a Bash command on your airflow server. For this demonstration, we will just print `hello world` to standard out (stdout).
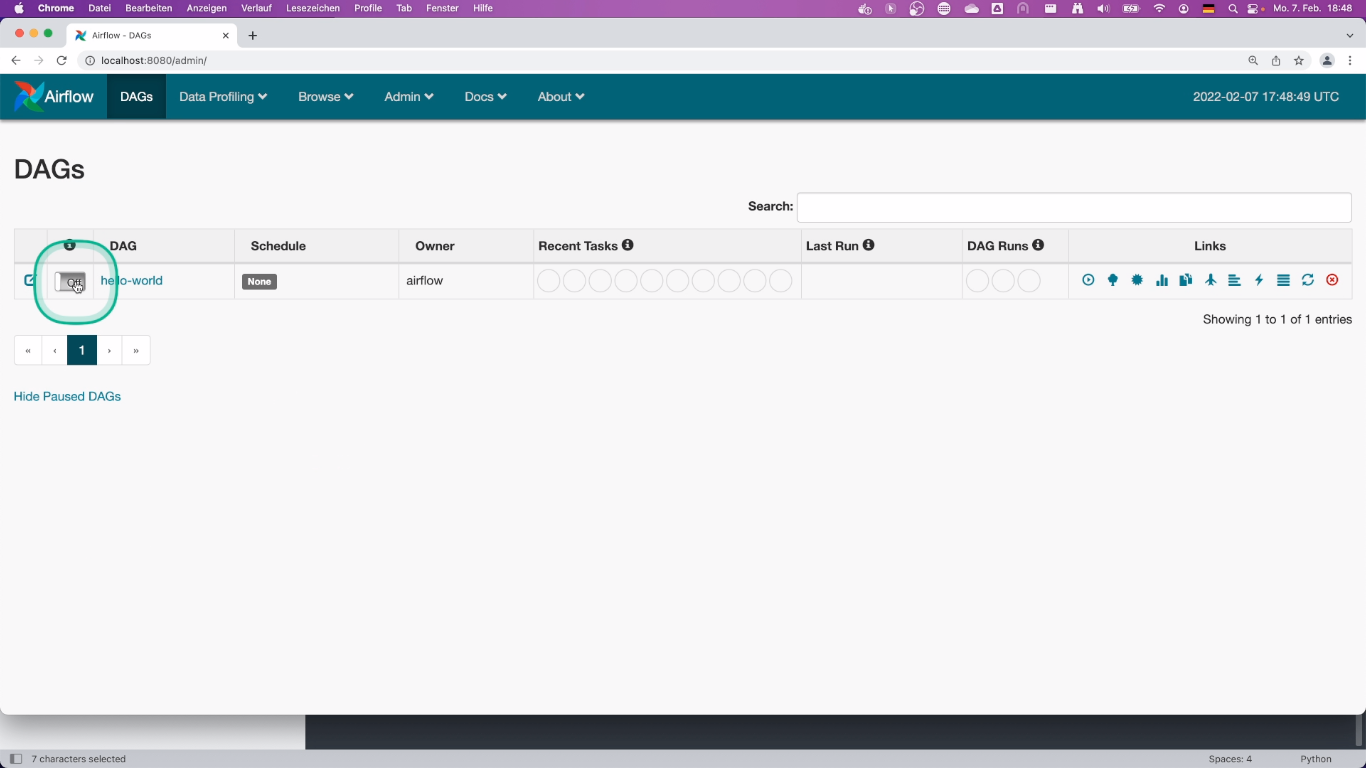
And that's it. You can now hit refresh on the airflow UI and see your dag showing up. Activate it by using the appropriate element:
and than you can run it using the "Trigger Dag" functionality.
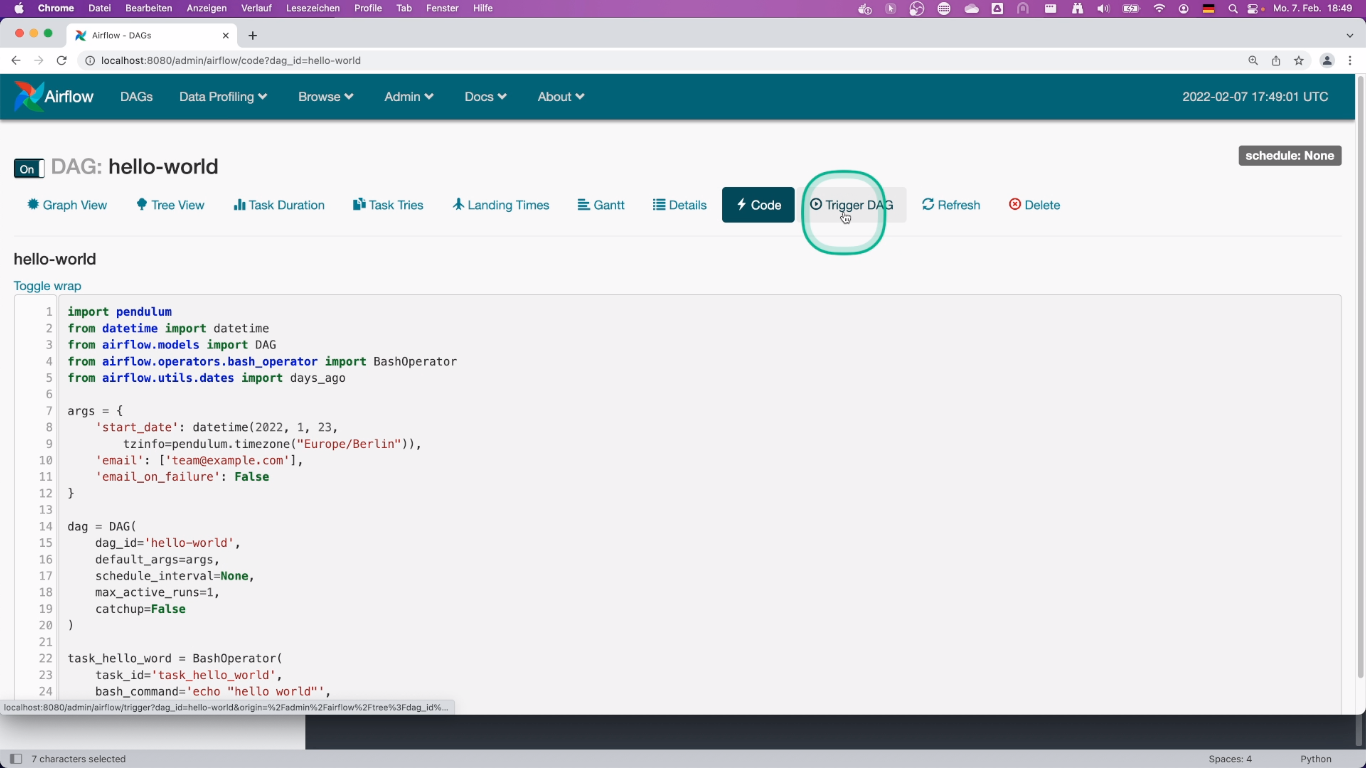
Take a look at the logs to see that everything is working as expected.